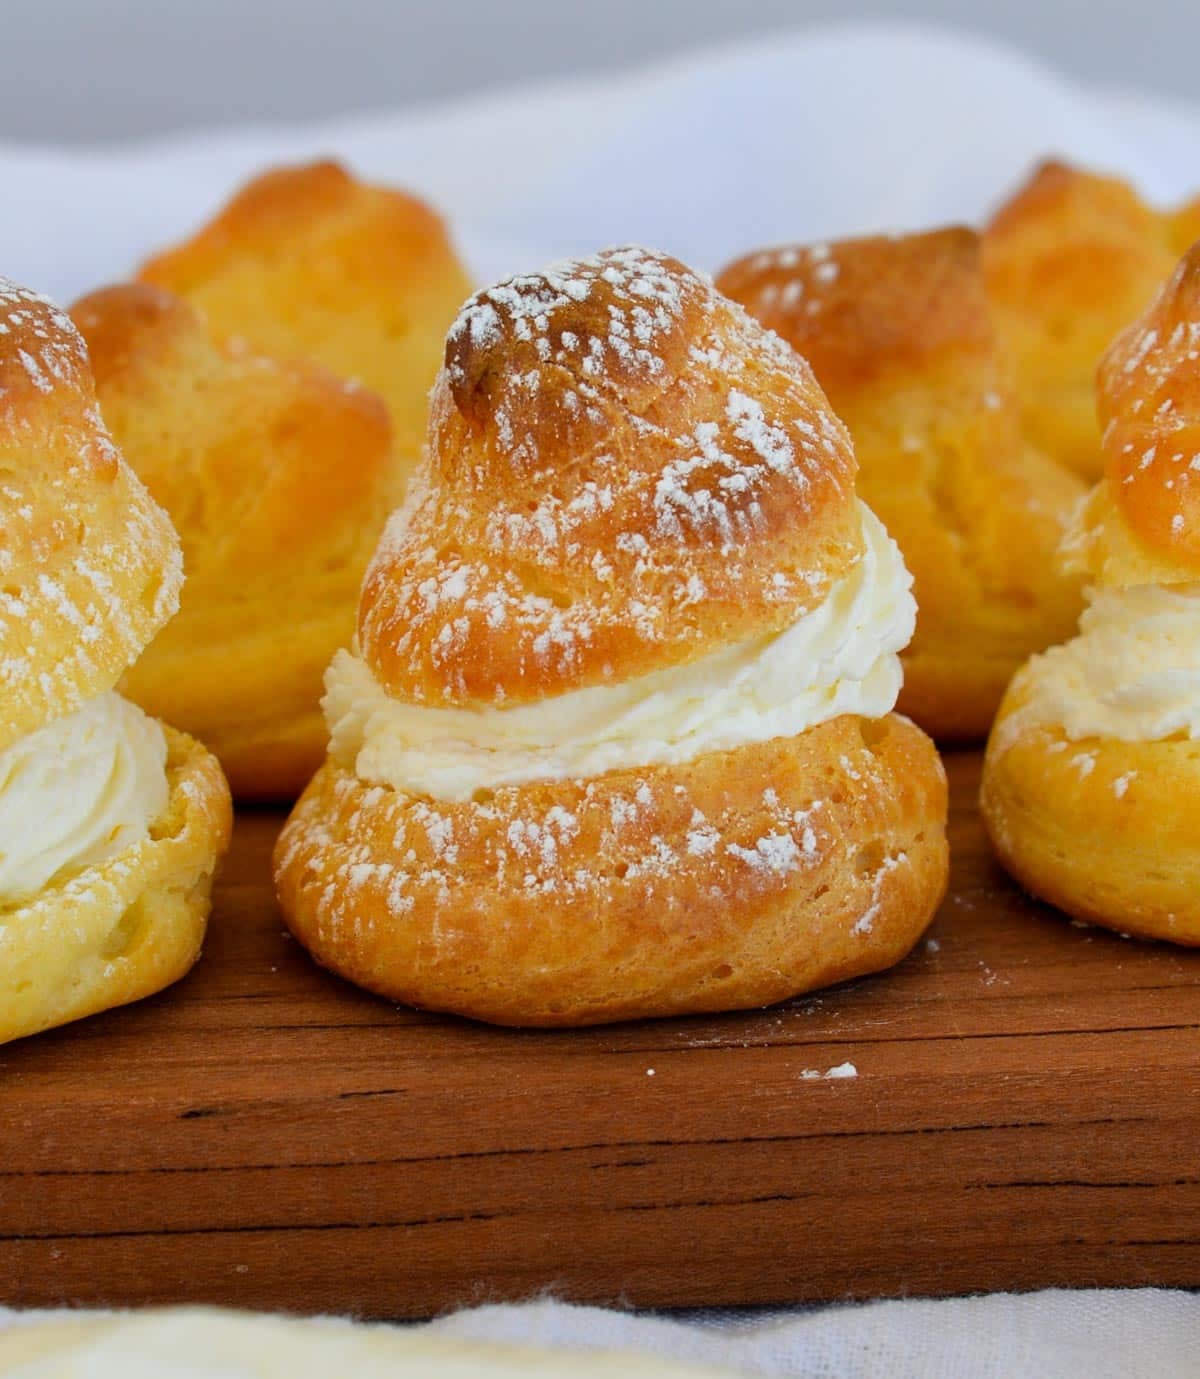
There’s something so fun about a tray of homemade cream puffs, and this sourdough version makes them even better. These Sourdough Cream Puffs are made with my sourdough take on a classic pâte à choux dough. Don’t worry, they don’t taste sour! The sourdough adds a subtle richness that makes these feel a little extra special, and they’re easier to digest thanks to sourdough fermentation.
Baked until golden and crisp on the outside, the shells puff up in the oven and create airy centers just waiting to be filled with whipped cream, pastry cream, or whatever you love. These sourdough cream puffs are made with a naturally fermented pâte à choux dough that gives them a light texture and rich flavor. They might look impressive, but they’re actually really easy to make!
Baked until golden and crisp on the outside, the shells puff up in the oven and create airy centers just waiting to be filled with whipped cream, pastry cream, or whatever you love. These sourdough cream puffs are made with a naturally fermented pâte à choux dough that gives them a light texture and rich flavor. They might look impressive, but they’re actually really easy to make!
Why You’ll Love Sourdough Cream Puffs
- Perfect Special Occasion Treat – Whether you’re hosting a holiday, shower, birthday, or just want a show-stopping dessert, these sourdough cream puffs are the perfect treat for any special occasion. For more show-stopping desserts, check out my collection of sourdough dessert recipes.
- Active Sourdough Starter Recipe – This recipe uses active sourdough starter, which means the batter is fully naturally fermented, just like my sourdough roll up pancakes. Sourdough isn’t just for bread, and this cream puff recipe proves it!
- Light and Airy Texture – These cream puffs are made with a sourdough choux pastry that bakes up with a crisp exterior and soft, airy center that’s perfect for filling with whipped cream, pastry cream, chocolate mousse, or even chicken salad.
- Flavorful Pastry – The sourdough starter adds a deeper flavor to the shells with a slightly buttery finish. If you enjoy making pastries like this, you’ll also love my Sourdough Pie Crust. It’s perfect for sweet treats like my Sourdough Berry Pie or even these Homemade Sourdough Pop Tarts.
Sourdough Discard Tip: I keep a jar in my fridge that I continually add sourdough discard to. Discard is a by-product of your sourdough starter and there is no reason to throw it away. Instead, use it in incredible sourdough discard recipes where it adds moisture and great flavor. Use older, more tangy discard in savory recipes like this Sourdough Chicken Pot Pie and young/fresh discard in sweeter recipes like this Chocolate Sourdough Pie Crust.
Important Ingredients
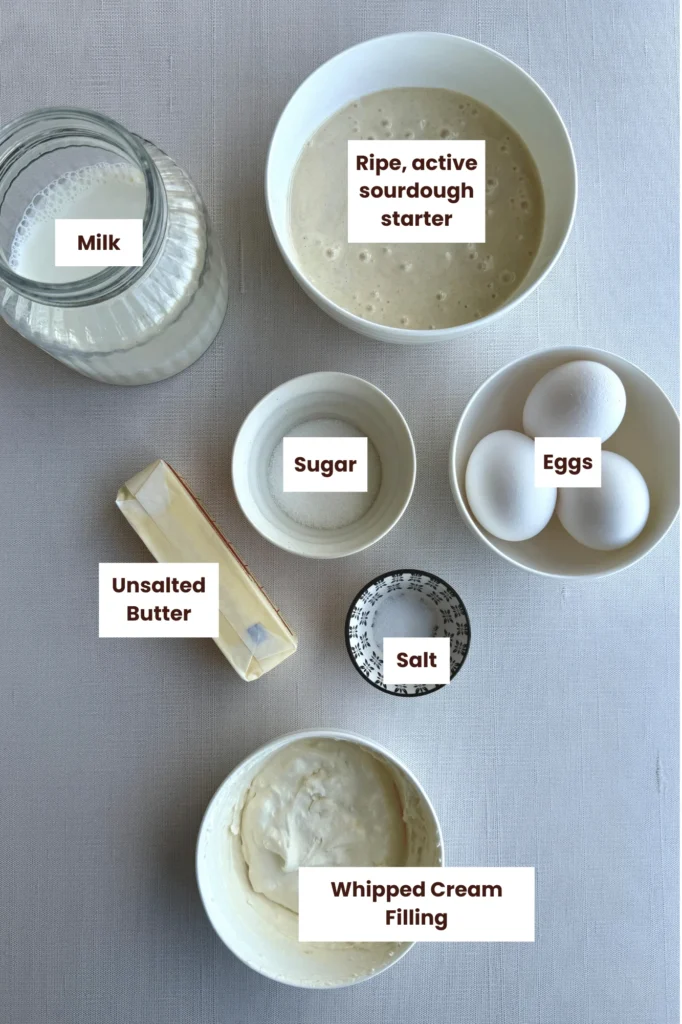
- Sourdough Starter – Use active sourdough starter or thick sourdough discard for this recipe. This recipe doesn’t use any additional flour beyond what’s in the sourdough starter, so it’s important to use active starter or a fresh, thick discard. Make sure it’s 100% hydration sourdough starter (equal parts flour and water).
- Unsalted Butter – Butter adds rich flavor and is essential for creating the smooth choux dough. It also helps the shells bake up tender with crisp edges.
- Milk – Milk adds richness and helps create a smooth, pipeable dough. It also contributes to better browning in the oven. Use whole or 2% milk.
- Eggs – Eggs are what give choux pastry its structure and lift. They create the steam needed for the cream puffs to rise and form hollow centers.
- Sugar – A small amount of sugar adds light sweetness and helps the shells turn golden as they bake.
- Salt – Balances the flavors and enhances the richness of the pastry.
- Whipped Cream Filling – A classic option for filling, whip together heavy whipping cream with sugar and vanilla extract. Pipe into cooled cream puffs.
Substitutions & Variations
- Water: You can substitute water for the milk if needed. The cream puffs will still puff up, but the flavor will be a little less rich and the color may be slightly lighter.
- Butter: If needed, you can use salted butter and reduce or omit the added salt in the recipe.
- Filling: This recipe uses a simple whipped cream filling, but you can easily switch it up. Try pastry cream, chocolate mousse, or even a savory filling like chicken salad. You can also drizzle melted chocolate over the top for an easy finish.
- Shape: You can use this same pâte à choux dough to make eclairs. Pipe the dough into longer rectangles instead of rounds, then fill with pastry cream and top with chocolate.
- Topping Ideas: Dust with powdered sugar, drizzle with chocolate, or dip the tops in a simple glaze for a more bakery-style finish.
How to Make Sourdough Cream Puffs
Make the Choux Dough
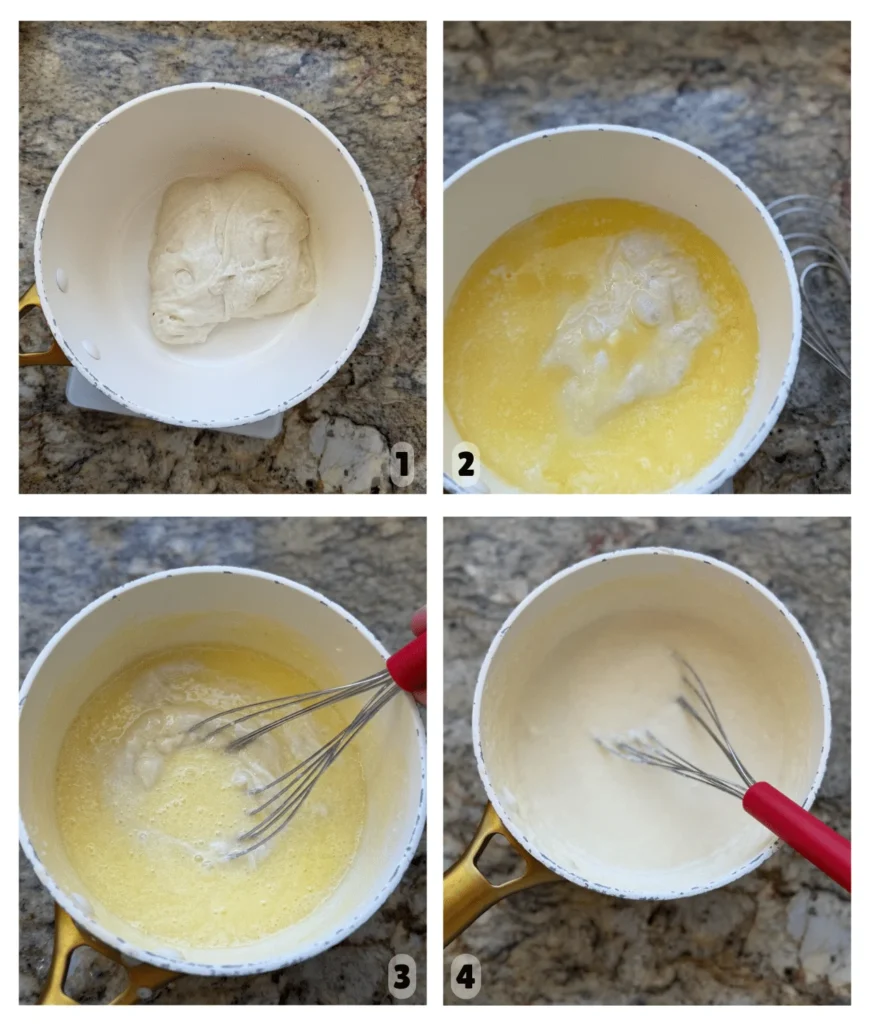
Step 1: In a medium saucepan, whisk together the active sourdough starter and milk until fully combined (Image 1). Add the melted butter and whisk again until smooth (Images 2 & 3). Stir in the sugar and salt and mix until everything is fully combined (Image 4).
Use Active Starter: If you don’t already have an active, bubbly sourdough starter ready to go, start here. Active starter is key for the best sourdough cream puffs, so you should mix your dough after your starter is peaked, bubbly, and active.
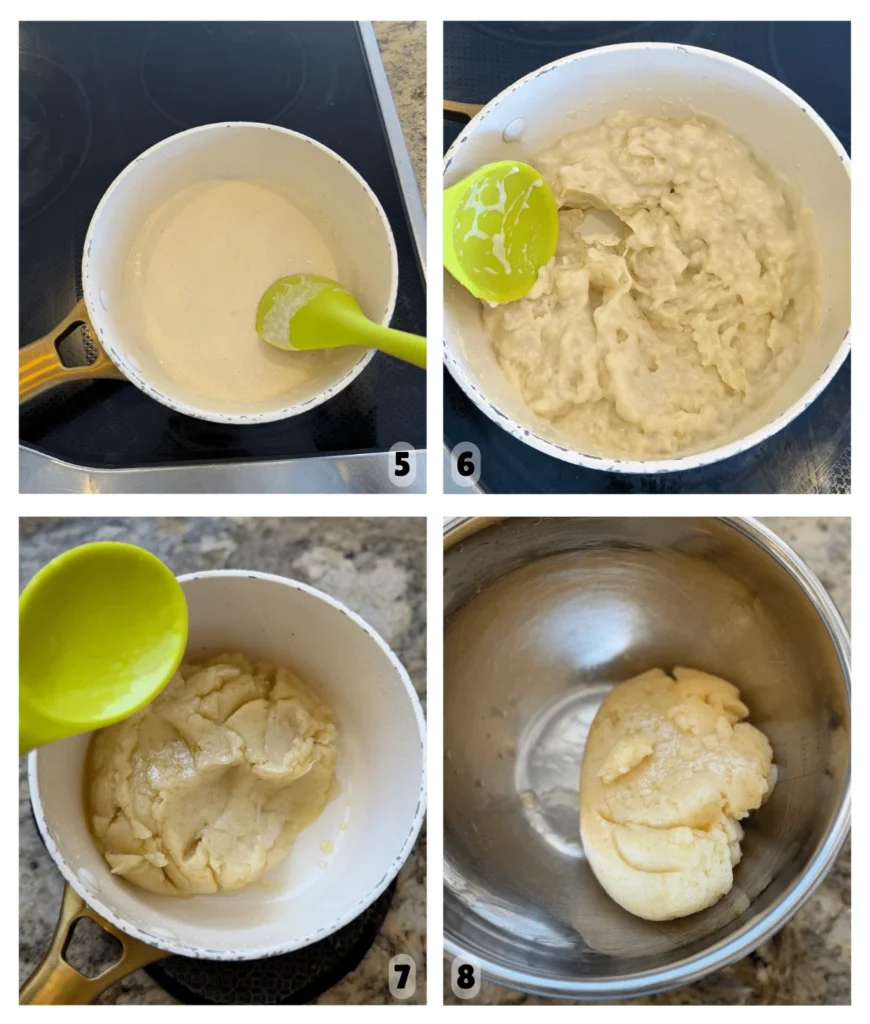
Step 2: Place the pan over medium heat and begin stirring continuously with a spatula (Image 5). Be sure to scrape along the bottom of the pan as you stir to prevent sticking and help the dough form.
Within a few minutes, the mixture will thicken and start to form clumps (Image 6). Keep stirring until it comes together into one cohesive ball with no visible wet spots. The dough should look smooth and slightly glossy (Image 7).
Remove from the heat, transfer the dough to a mixing bowl, and let it cool slightly (Image 8). You should have about 460 grams of dough.
Why This Works
In traditional cream puffs, flour, water, and butter are cooked together on the stovetop to create a thick paste. That step cooks the flour and helps build the structure of the dough.
In this sourdough version, your starter already contains flour and water, so everything is mixed together first. Cooking it on the stovetop still does that same important job. It thickens the dough and cooks the starches in the starter so the dough can hold its shape and properly absorb the eggs.
When baked, the moisture in the dough turns to steam, which is what makes the cream puffs rise and create that hollow center.
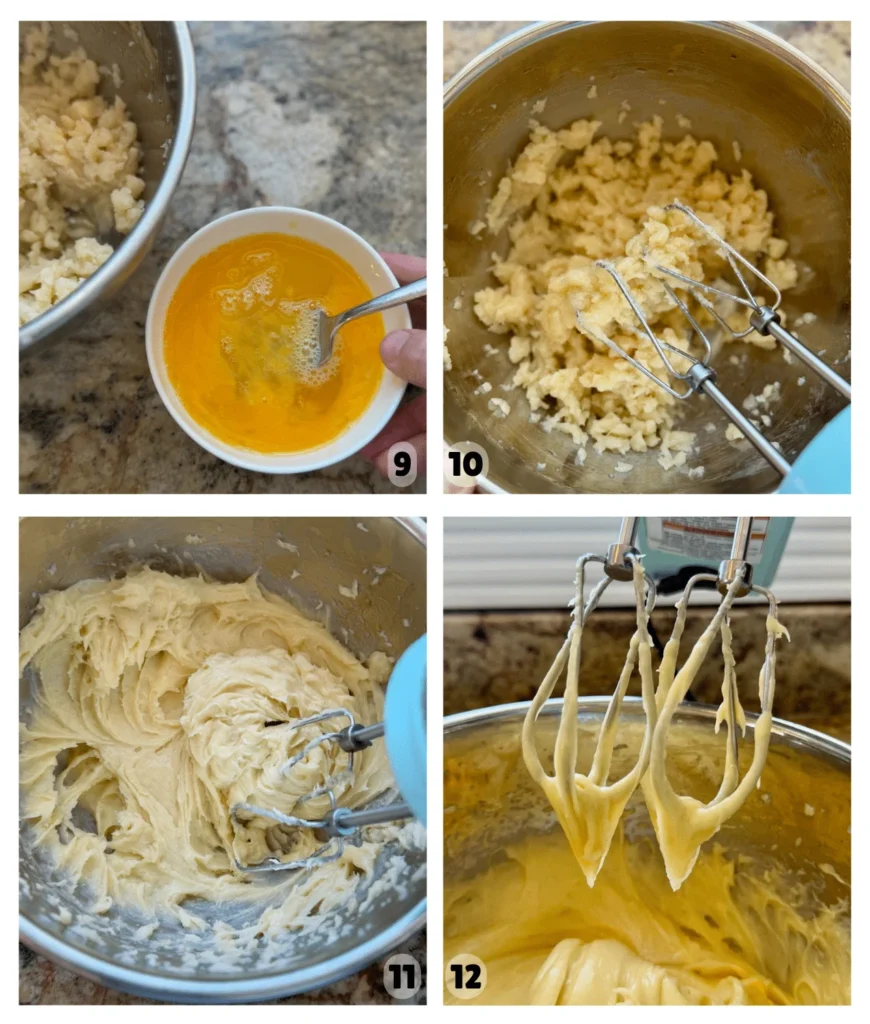
Step 3: While the dough cools slightly, whisk the eggs together in a separate bowl (Image 9). For this recipe, you’re aiming for about 160 grams of egg to 460 grams of dough.
Choux pastry is sensitive to too much egg, so it’s important to add it gradually. Using a hand mixer, beat the cooled dough briefly to release any remaining steam (Image 10). With the mixer running, add the eggs a little at a time, mixing fully between each addition (Image 11).
Amy’s Tip: You can mix the eggs in by hand with a wooden spoon instead of using a hand mixer. It takes a little more effort, but works just as well.
Keep adding egg until the dough becomes smooth and velvety. When you lift the beaters, the dough should fall in a thick ribbon and form a soft “V” shape (Image 12). That’s how you know it’s ready.
Amy’s Tip: Be careful when adding the eggs. Add them a little at a time. You want the dough thick, smooth, and pipeable. If it gets too runny, the cream puffs won’t hold their shape.
Pipe the Dough
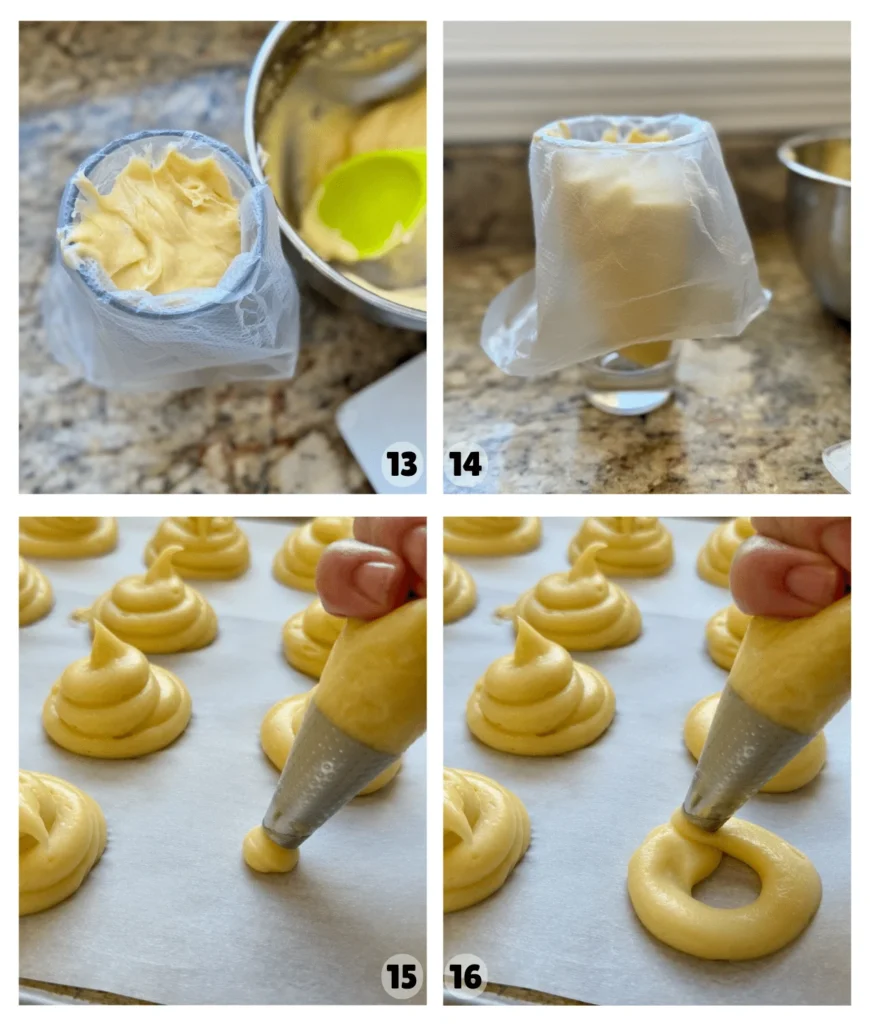
Step 4: Transfer the dough to a piping bag or large zip-top bag (Images 13 & 14). Snip off a corner or use a round piping tip.
Pipe mounds about 2 inches wide and 1 inch tall onto the baking sheet lined with parchment paper, spacing them about 1½ inches apart (Images 15 & 16). You should get around 20 cream puffs.
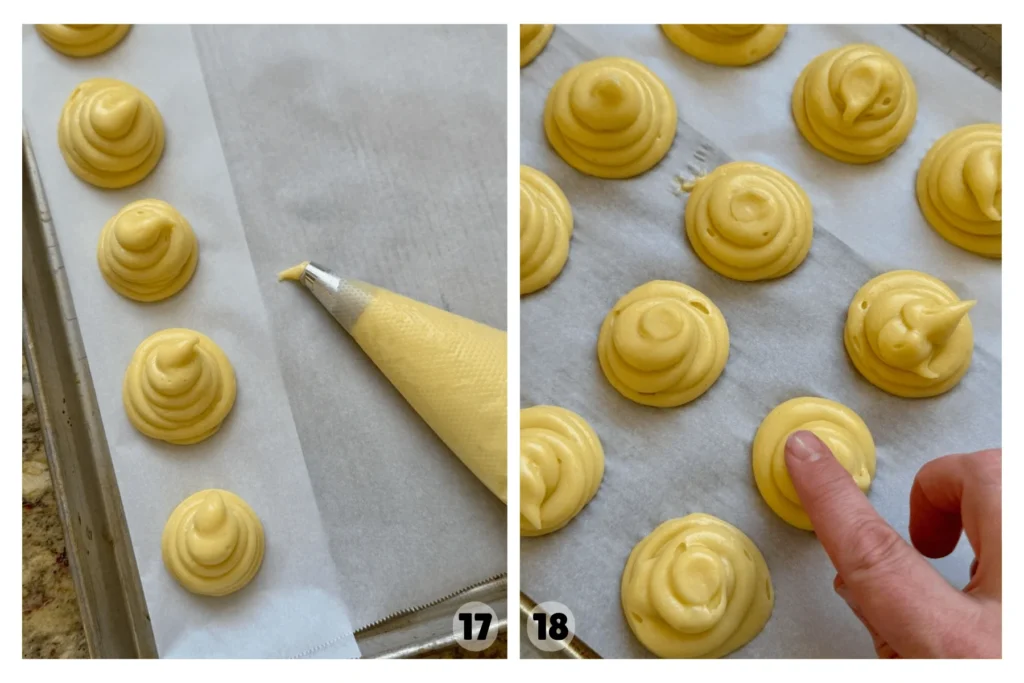
Lightly dampen your fingers and gently smooth down any peaks on top. This helps them bake evenly and look more polished (Images 17 & 18).
Amy’s Tip: You can make smaller or larger cream puffs depending on your preference. Just adjust the bake time as needed—smaller puffs will bake faster, and larger ones will need a little more time.
Bake The Cream Puffs
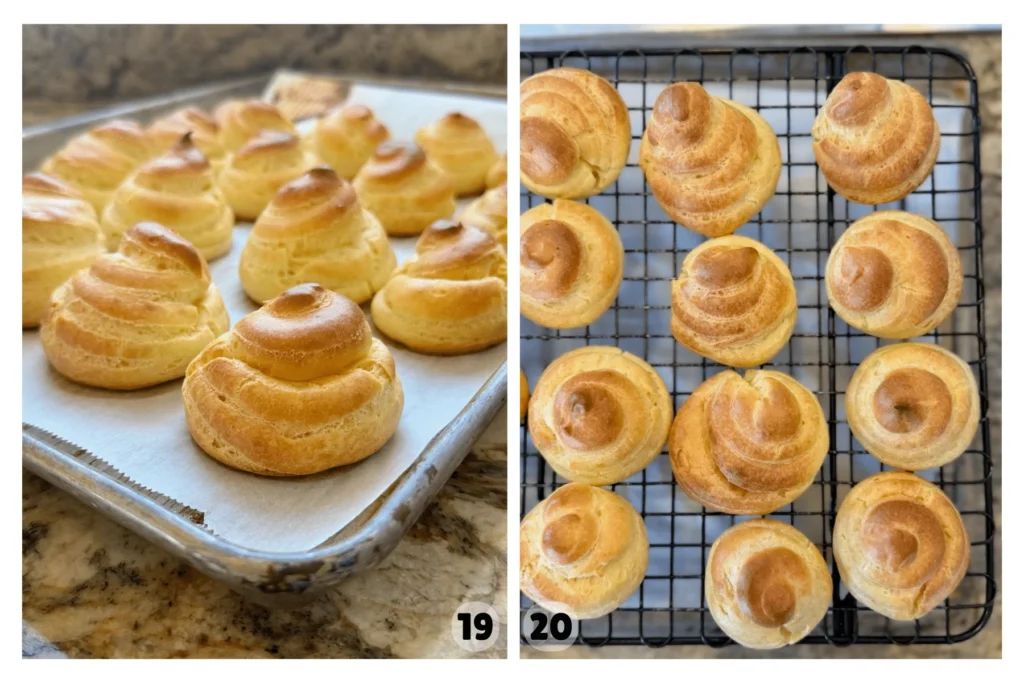
Step 5: Bake at 400°F for 20 minutes. Without opening the oven door, reduce the temperature to 350°F and bake for another 20 minutes. The cream puffs should be puffed, dry, and light golden brown.
Avoid opening the oven early, as this can cause them to collapse.
Transfer the baked shells to a cooling rack and let them cool completely before filling (Images 19 & 20).
Amy’s Tip: Underbaked cream puffs will collapse as they cool. If they feel soft after baking, turn off the oven, crack the door open, and let them sit inside for 5–10 minutes to help them dry out.
Make Whipped Cream and fill Cream puffs
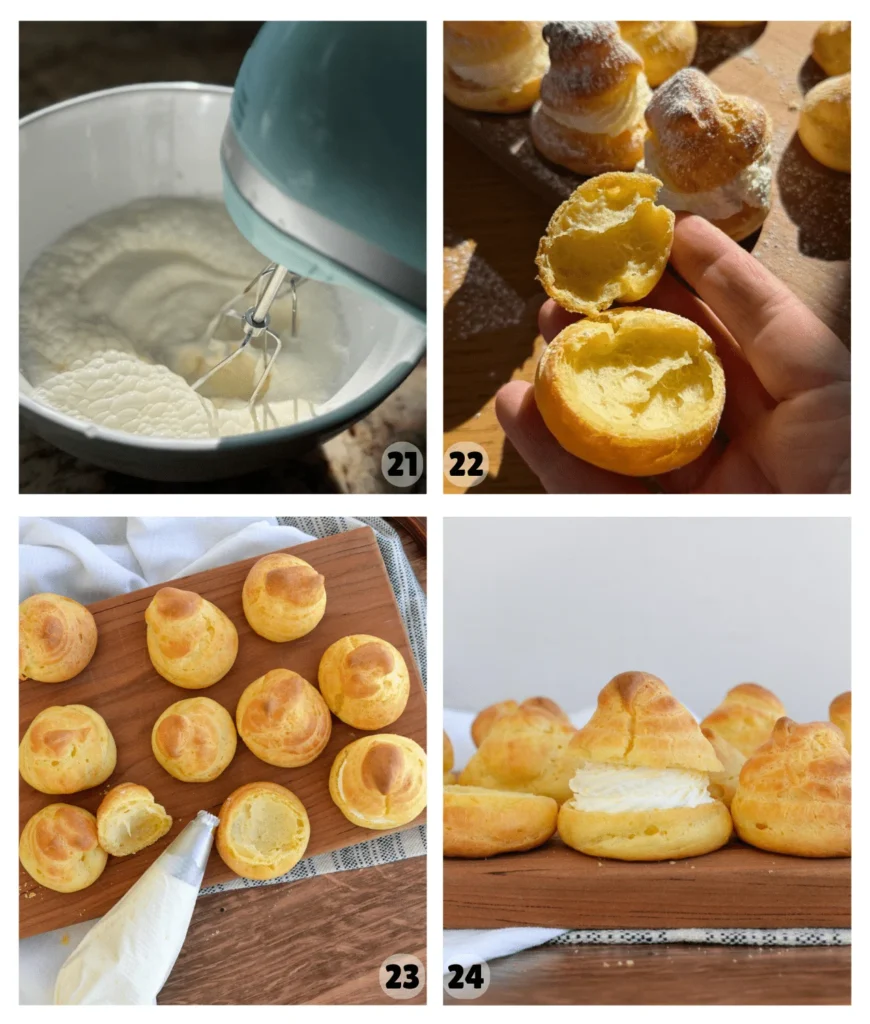
Step 6: In a mixing bowl, add cold heavy cream, 5–10 grams of granulated sugar, and a splash of vanilla extract. Whip until medium peaks form. When you lift the beaters, the peak should hold its shape but gently droop at the tip (Image 21).
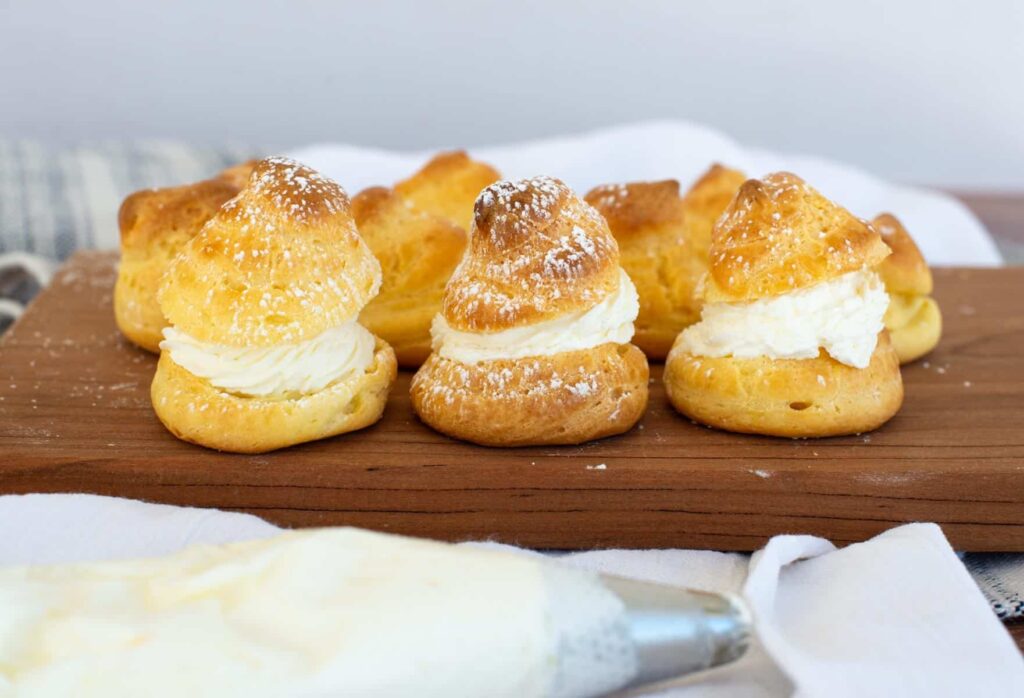
Transfer the whipped cream to a piping bag and snip off a corner. Slice the cooled cream puffs in half (Images 22 & 23). Pipe whipped cream onto the bottom halves, then gently place the tops back on (Image 24).
If you prefer, you can pipe the filling into the bottom or side of the cream puff instead of slicing them in half. I also like to add a raspberry or blackberry in the center of the whipped cream for an extra pop of flavor.
Finish with a dusting of powdered sugar or a drizzle of chocolate. Serve immediately for the best texture.
Amy’s Tip: I like to fill the cream puffs just before serving. This keeps the shells crisp and prevents them from getting soggy.
How to Store Sourdough Cream Puffs
Unfilled Cream Puffs: Store the baked, unfilled shells in an airtight container at room temperature for up to 2 days. If they soften, you can crisp them back up in a 300°F oven for 5–10 minutes.
Filled Cream Puffs: Once filled, store cream puffs in the refrigerator in an airtight container for up to 2 days. The shells will soften over time, and the filling may start to leak, especially if using freshly whipped cream.
Make Ahead Tip: You can bake the shells ahead of time and store them at room temperature, then fill just before serving for the best texture.
Freezing: Unfilled shells can be frozen in an airtight container for up to 2 months. Thaw at room temperature, then crisp them in the oven if desired. Let them cool before filling.